Google Play License Testing Setup: Configure Billing Testers
By TesterBee QA Team · Last updated: July 2026 · 3 min read
If your app uses Google Play Billing for in-app purchases or subscriptions, you need license testers — Google accounts that can test your billing integration without being charged real money. License testing lets you verify the entire purchase flow: product listing, checkout UI, payment processing, and receipt validation — all with test card numbers instead of real payment methods.
This guide walks you through configuring license testers in your Google Play Console so your testing team (or a service like TesterBee) can verify your billing implementation without real charges during the closed testing period. The setup takes under two minutes.
From our experience: At TesterBee, we verify billing flows for hundreds of apps. The #1 reason billing verification fails during closed tests is developers forgetting to configure this specific setting, causing our testers' test purchases to trigger real credit card charges (which they will cancel). Setting this up correctly prevents rejected tests.
What is license testing and why do you need it?
License testing is a Google Play Console feature that lets designated Google accounts make test purchases in your app without incurring real charges. When a license tester completes a purchase flow, Google Play processes it exactly like a real transaction — including order IDs, purchase tokens, and receipt data — but does not charge any payment method.
You need license testers configured before your closed testing period begins if your app includes any of the following:
- In-app purchases (consumable or non-consumable products)
- Subscriptions (auto-renewing or prepaid plans)
- One-time unlock or premium feature purchases
- Any Google Play Billing Library integration
Without license testers, users who attempt a test purchase will either be blocked or charged real money — neither of which is acceptable. Adding your test team's Google Group (or [email protected] if you use TesterBee) lets testers fully verify your billing flow.
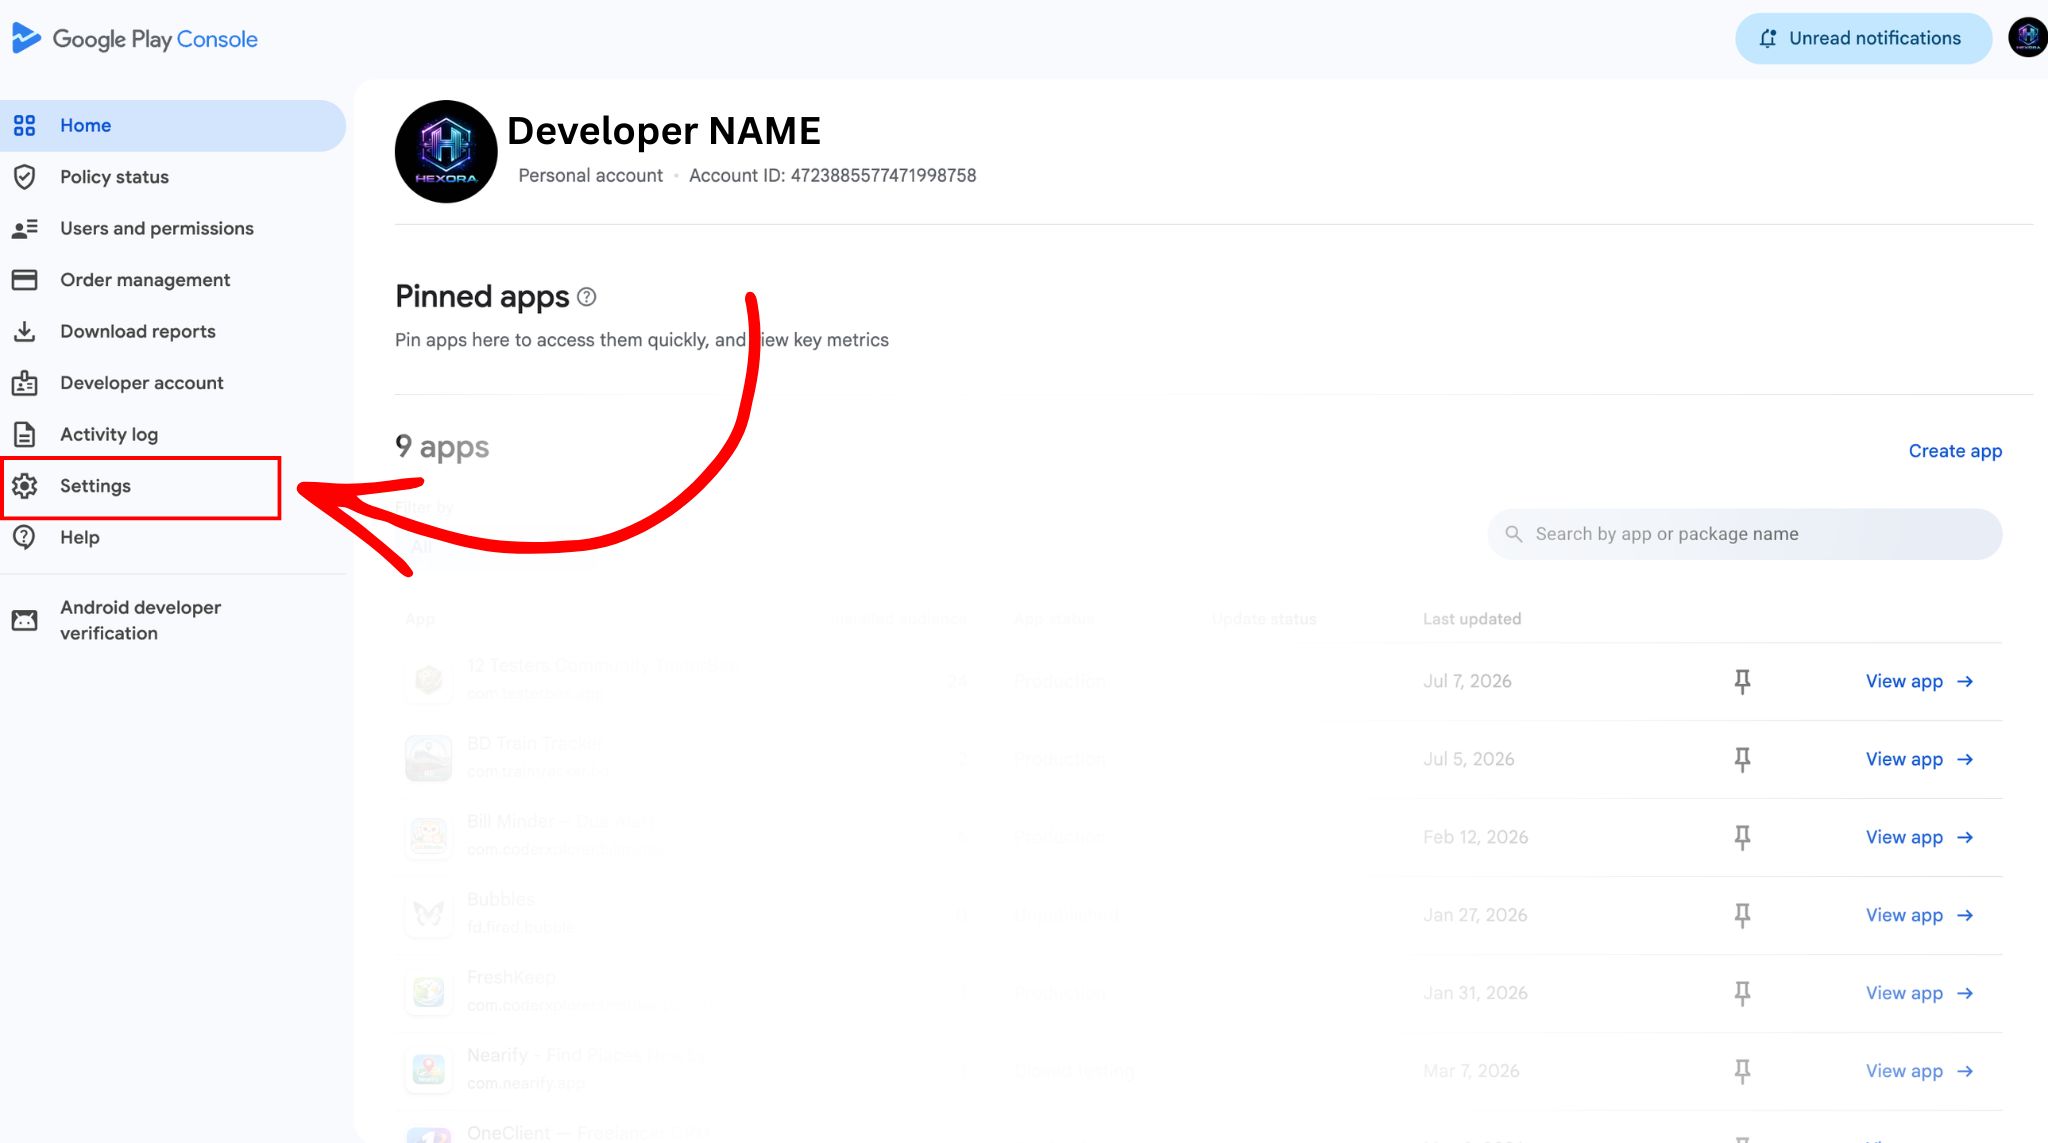
Step 1: Open Settings from the Play Console dashboard
Go to the Google Play Console home page and click Settings from the left sidebar navigation. This is the same settings area where you manage API access, developer account details, and payment profiles.
Step 2: Navigate to License testing
Once you are in Settings, look at the main panel area (not the left sidebar). Scroll down and click the License testing row from the list of settings options. This opens the license tester management panel where you can add Google Groups or individual Gmail addresses as authorized test purchasers.
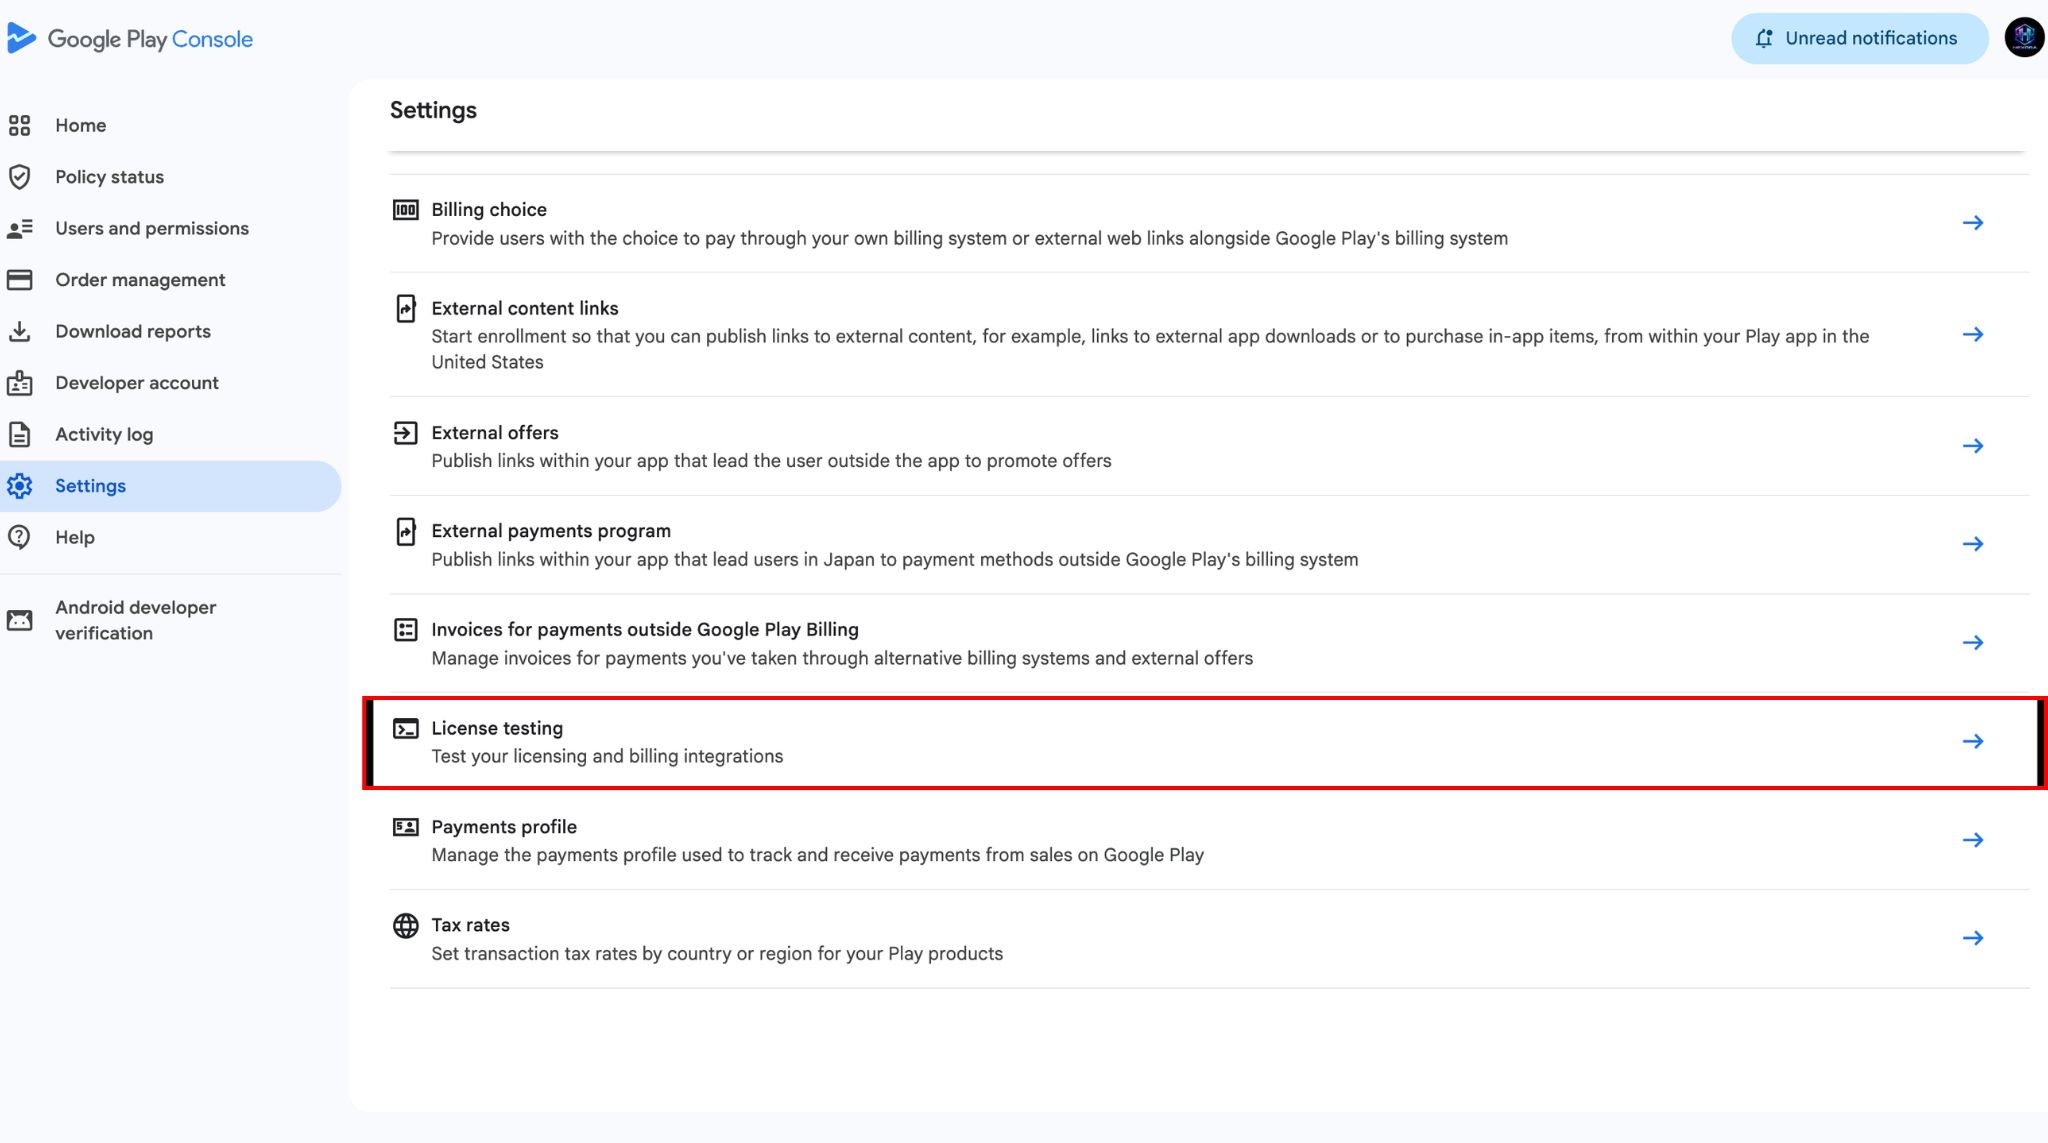
Note: License testing is an account-level setting, not per-app. Any license tester you add will have test purchase access across all apps in your developer account. This is by design — it means you only need to configure this once.
Step 3: Add license testers and save
In the License testing panel, follow these steps:
- Choose Google Groups as the tester type. Google Groups is the recommended method because it lets you manage testers as a group rather than adding individual emails.
- In the email field, enter your Google Group's email address. (If you are using TesterBee to provide your testers, enter
[email protected]here as shown in the screenshot). - Keep the License response dropdown set to
RESPOND_NORMALLY. This ensures Google Play returns standard purchase responses during testing — exactly what your app expects in production. - Click Save changes to apply the configuration.
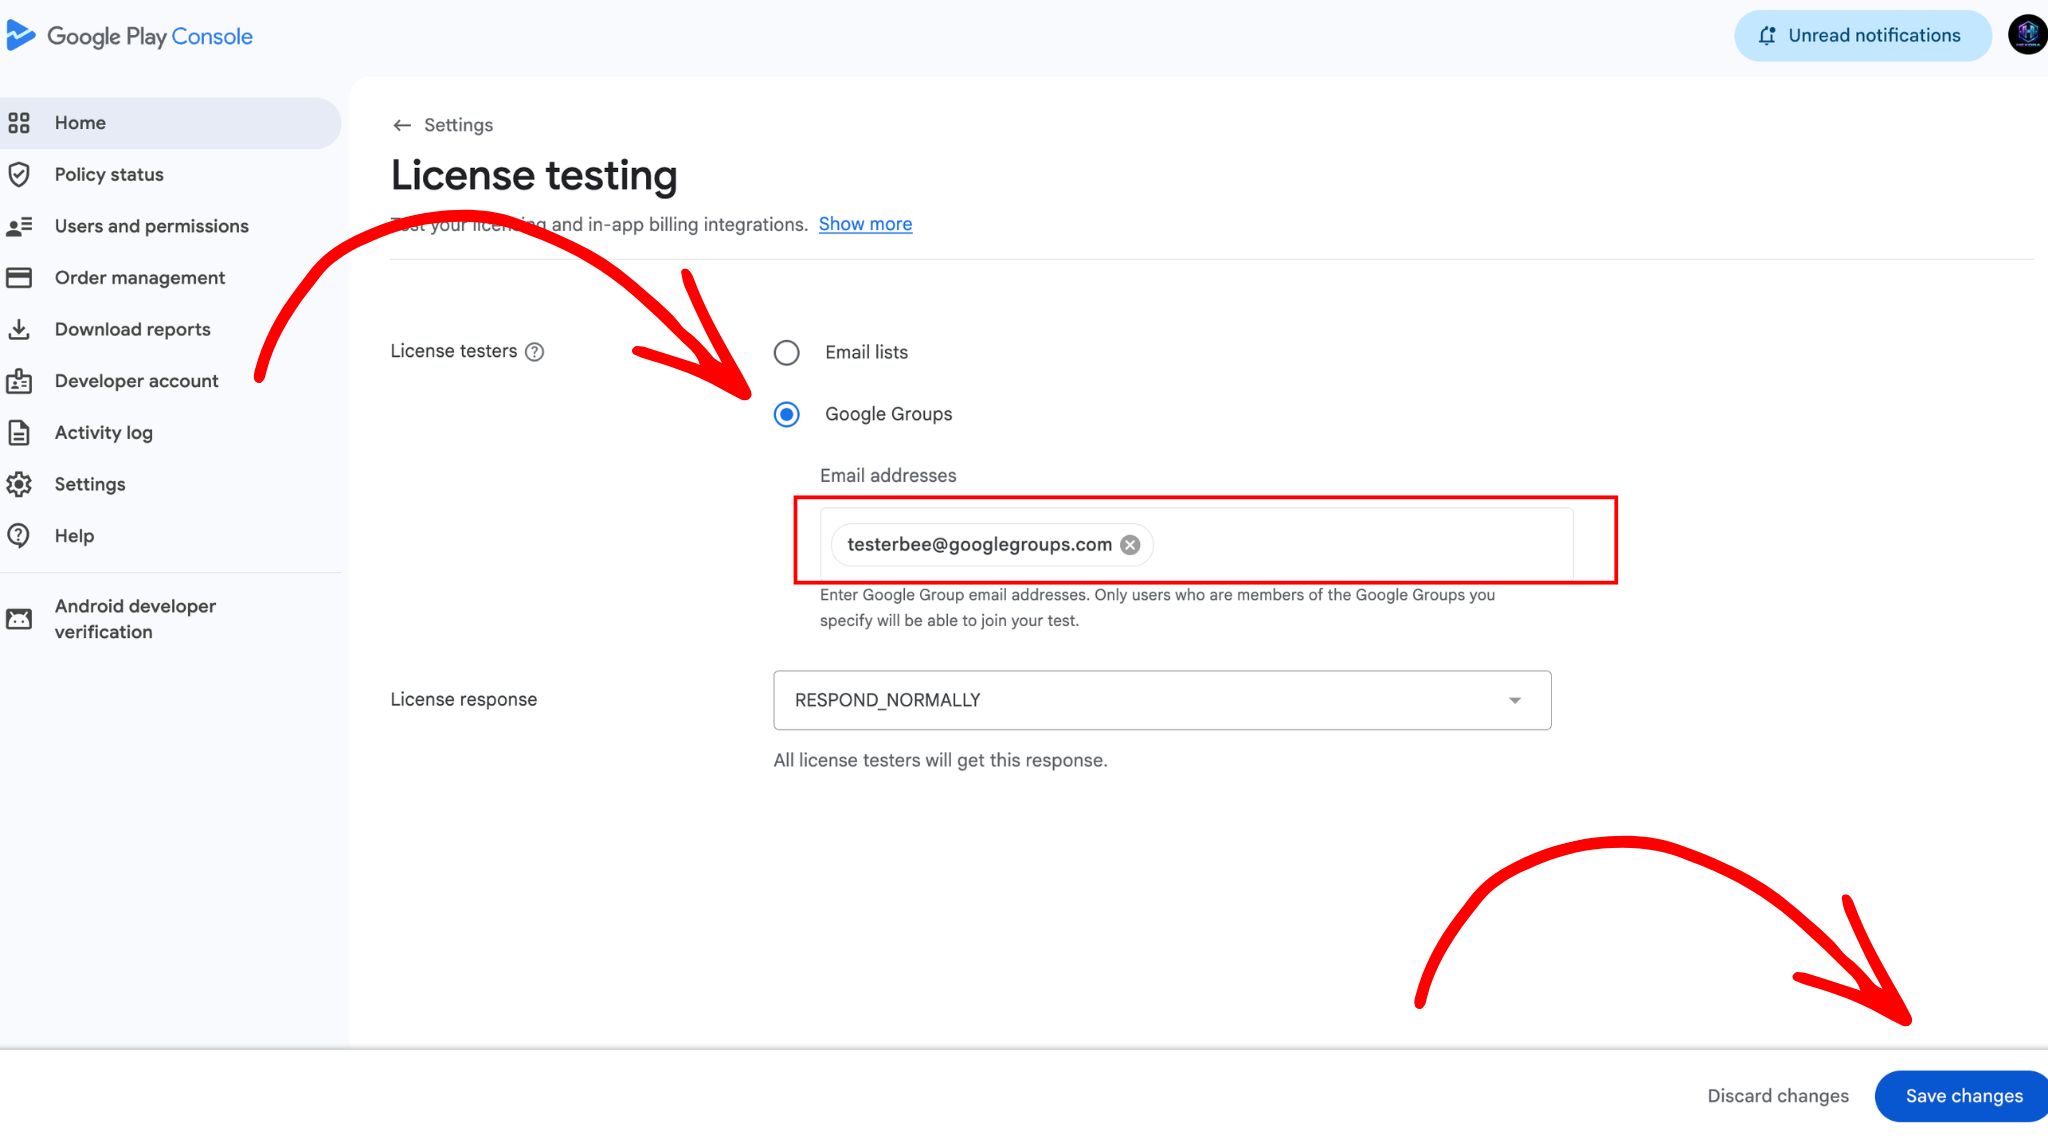
What does RESPOND_NORMALLY mean? This tells Google Play to process test purchases exactly like real ones — returning valid purchase tokens, order IDs, and acknowledgement states. The only difference is the payment is not charged. The other options (LICENSED, NOT_LICENSED, ERROR) are for legacy licensing and should not be used with Google Play Billing Library 5.0+.
How to verify your license testing setup
After saving, verify that everything works:
- Open the License testing page again — you should see your Google Group email (e.g.,
[email protected]) listed under your license testers. - If you want to test it yourself, add your own Gmail address as a license tester (temporarily), install your app from the closed testing track, and attempt a test purchase using a test card. The purchase should complete without any real charge.
- Check that your app's purchase verification (backend receipt validation) correctly handles the test purchase tokens.
Common issues and fixes
Test purchase returns "Item unavailable" error
This usually means your in-app products are not yet activated. Go to Play Console, navigate to your app, open Monetize > Products, and confirm each product's status is Active. Products remain in "Draft" state until you explicitly activate them.
License tester still sees real payment dialog
Confirm the tester's email is listed under License testing in Settings (not app-level settings). Also confirm the tester is using the exact same Google account on their device that is listed as a license tester. Test purchases only work when the signed-in Play Store account matches a license tester email.
Changes not reflecting immediately
License testing changes can take up to 15 minutes to propagate across Google's servers. Wait 15-20 minutes after saving before testing. If changes still do not take effect, sign out and back into the Play Store app on the test device to force a refresh.
Need testers who can verify your billing flow?
TesterBee testers are configured as license testers across all campaigns. Once you add [email protected], every tester in your campaign can complete test purchases without real charges. Our testers verify purchase flows, subscription trials, and receipt validation as part of your standard closed testing campaign.
Get 12 testers for your app